Mastering the correct wrist hinge is a crucial element in developing a consistent and powerful golf swing. In this guide, Performance Golf coach Eric Cogorno breaks down the essential checkpoints for proper wrist hinge, explains common swing and grip mistakes, and shares a simple drill to help you perfect this motion.
If you’re looking for solid ball striking and improved overall performance on the golf course, be sure to watch the video, then check out the drill in more detail below!
Three Key Checkpoints for Proper Wrist Hinge
Proper wrist hinge should be established early in the swing to prevent compensations later. The best ball strikers consistently follow these three key checkpoints:

90-Degree Hinge
By the time the lead arm reaches the parallel position in relation to the ground in the backswing, there should be approximately a 90-degree angle between the lead arm and the club shaft. This ensures proper wrist loading for a controlled and powerful downswing.
Correct Hinge Plane
The club should be hinged along a plane that aligns with or is just inside the ball-target line. This prevents excessive deviations that could lead to inconsistencies in clubface control and impact position.
Flat Lead Wrist
The lead wrist should transition from a slightly cupped position at setup to a flat position when the lead arm reaches parallel. This promotes a square clubface and proper shaft positioning for optimal ball striking.
Understanding Proper Wrist Motion
Wrist motion in the golf swing consists of two key movements:
- The lead wrist controls the up-and-down motion (hinging the club like a hammer).
- The trail wrist controls the back-and-forth motion (bending backward to support a flat lead wrist).
A common mistake golfers make is increasing the cupping of the lead wrist when hinging up, which steepens the club shaft and opens the clubface. To counter this, the trail wrist must bend back properly, promoting a shallower plane and square clubface.
A Simple Drill to Train Wrist Hinge
To train proper wrist hinge, follow this two-part drill.
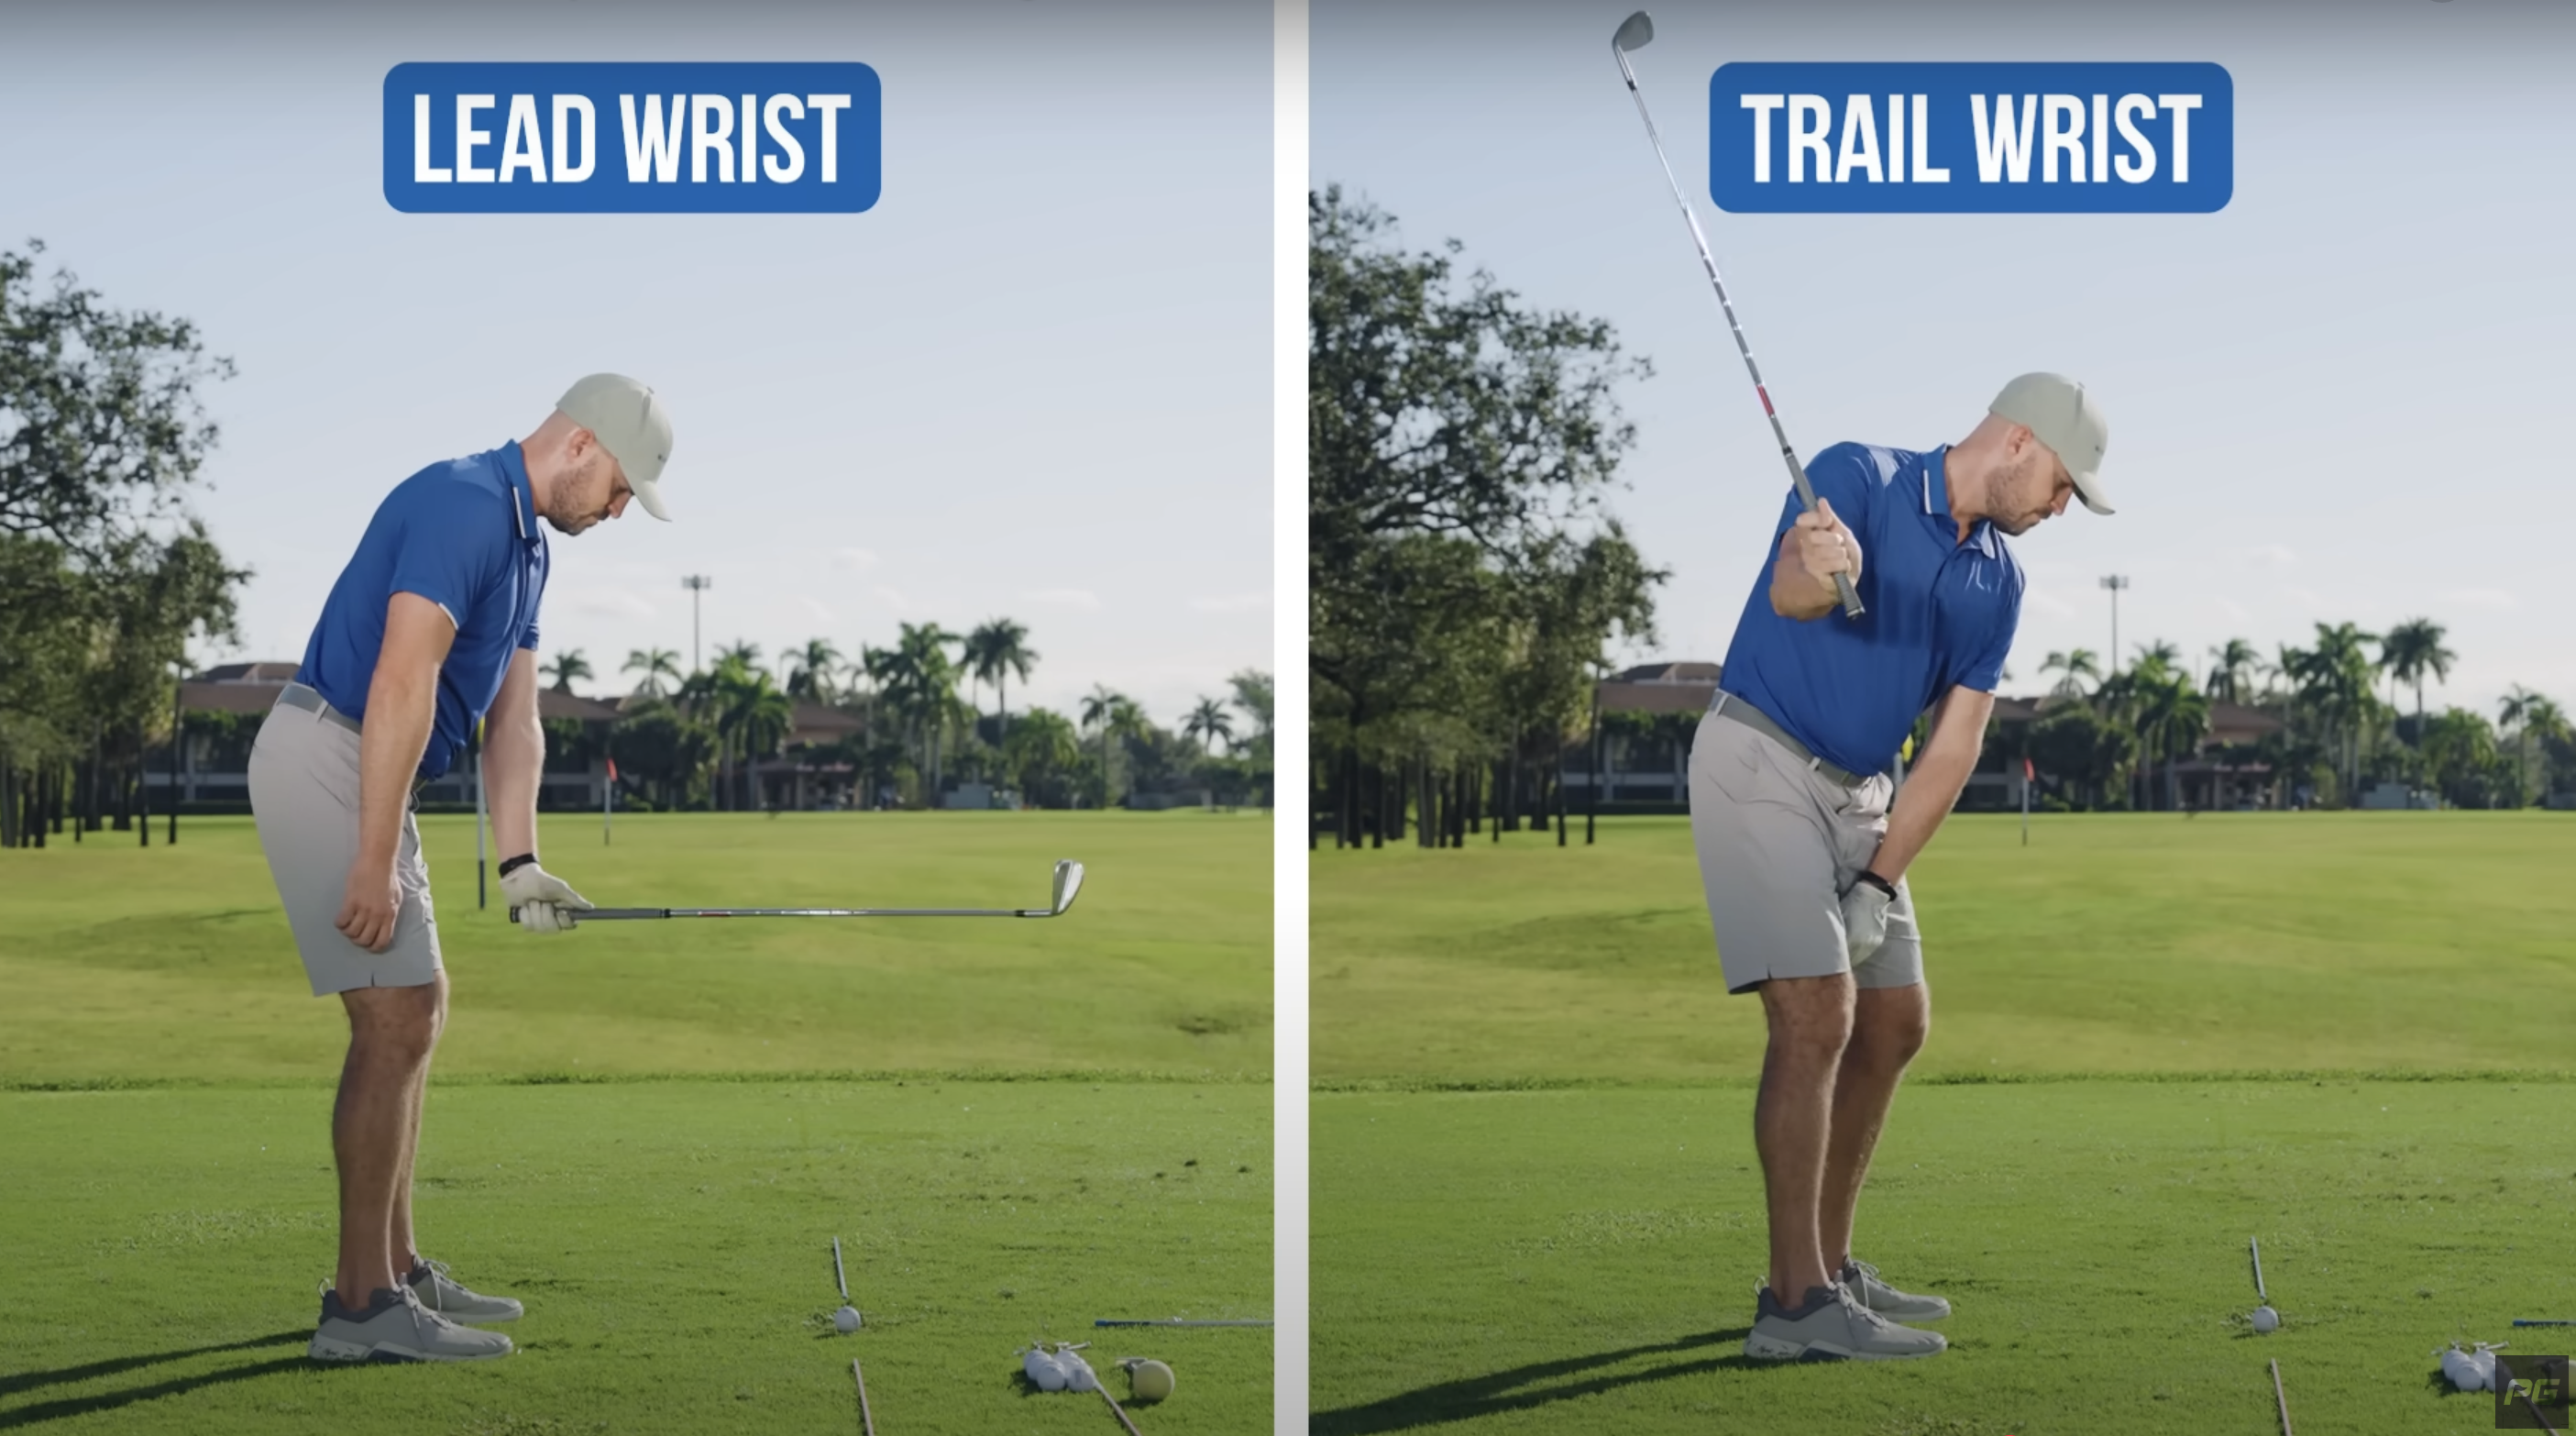
Using only your lead hand, hinge the club up and in front of you (above left) to about 90 degrees, then hinge it down to strike the ground. Repeat three times.
Next, grip the club with your trail hand and focus on bending your wrist back (knuckles toward the forearm) in the backswing (above right). This motion helps flatten the lead wrist, ensuring a more consistent and effective impact position.
Finally, combine these motions by feeling the lead wrist hinge up and the trail wrist bend back progressively throughout the backswing.
The Importance of Proper Wrist Hinge
Proper wrist hinge provides two critical benefits:
- Increased Power – Without wrist hinge, swing speed is significantly reduced, leading to weak shots.
- Better Ball Contact – Wrist hinge ensures the clubhead descends properly, allowing for solid strikes with ball-first contact..
By incorporating these principles into your practice routine, you’ll improve both the consistency and power of your golf swing.
Remember the three key checkpoints—90-degree hinge, correct hinge plane, and a flat lead wrist—and use the provided drill to ingrain proper wrist motion. If this video and guide helped you out, be sure to subscribe to the Performance Golf YouTube channel for more free golf swing tips every week!